Not again!
In your hurry to get up, you accidentally spill coffee on the document you had spent several hours working on, it’s not the first document you have ruined with spills. You begin to feel the need to laminate all your important documents. Unfortunately, you don’t have a lamination machine and you start wondering if there are any ways to laminate at home without a machine.
If the pandemic has taught us anything, it’s that adversity is the genesis of discovery. Though Working from home is a great advantage but it brings a lot of challenges like access to machines and other accessories like fax, copies or laminating machines, etc. Forget having to buy an expensive lamination machine. This article will definitely serve as your perfect guide through the jungle of how to laminate at home without a machine.
Must you have a machine in order to laminate? Are there any ways to laminate at home without a machine? If you want to explore the ways to laminate at home continue reading and you would be surprised by how affordable it is to laminate at home without using a lot of resources.
What is Lamination?
Lamination is the process of covering a printed product with a special film. The main purpose is to:
- Protect the laminated materials from external damage caused by wear and tear, moisture impact, and direct sunlight. This enhances the durability of the materials.
- Renew papers and make the colors brighter depending on the film used for lamination.
- Increase the strength of the material being laminated.
It is therefore important to laminate documents and the main methods to laminate at home even without a machine include:
4 Ways to Laminate at Home Without a Machine
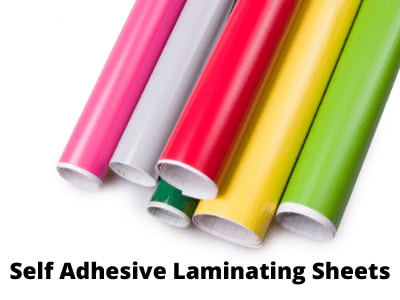
1. Laminating Paper with Self Adhesive Sheets
This is the most convenient and affordable way to laminate at home especially if you need to laminate frequently. First, you will need to buy self-adhesive laminating sheets which come at an affordable price of $12 to $50 for every box of self-adhesive laminating sheets. The best ones come with a grid on the backing that allows you to reposition the paper if you make an error placing it on the sheets.
Here are the steps to follow when using this method:
- Clear a large area enough to comfortably work on such as the top of a table.
- Separate the backing carefully from the plastic adhesive using your nails. Ensure you don’t leave fingerprints in the adhesive.
- Use the grid’s guidance to position the self-adhesive sheet on your work surface with the adhesive side up and the grid under it.
- Position your document centrally on the adhesive side. Ensure the border all around the document is uniform.
- Take another adhesive sheet and remove its backing to expose the adhesive. Discard the backing.
- Place the second adhesive over the document ensuring it is properly in line with the lower adhesive sheet and the document is enclosed between the upper and lower sheets.
- Smooth the document carefully using a ruler to remove the air bubbles and wrinkles. Simply hold the ruler against the laminated paper and rub it back and forth until they are gone.
- Trim the plastic edges as necessary and you are done.
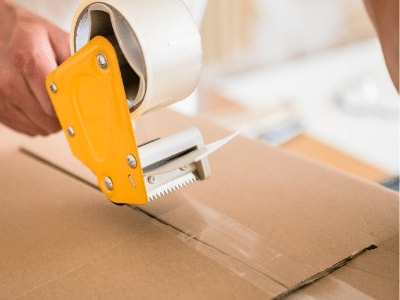
2. Laminating Paper with Clear Packing tape
Clear packing tape is incredibly cheap and can be easily found. Whether you want to label your bins, baskets, kitchen storage tins, or any small labels, this is the most suitable method to apply. It is a great way to laminate little pieces such as labels.
To laminate paper with clear packing tape, proceed as follows:
- Clear packing tape is a single layer with an adhesive on one side. Roll out some tape and place it on the table with the adhesive side up.
- Position the paper centrally over the tape and carefully press down using your hands and smooth to remove wrinkles and air.
- Measure a distance on the tape similar to the length of the paper you are laminating. Mark the tape and cut it with a pair of scissors of paper trimmer.
- Place the cut tape over the paper with the adhesive side on the paper such that the paper lies centrally between the two tapes.
- Use your hands to smooth out the tape on both sides to remove the air bubbles trapped within.
- Finally, evenly cut the tape at the edges to ensure they are in line with the paper. Now you have your fancy laminated label.
3. Laminating Paper using Thermal Laminating Pouches
Laminating pouches are a unique sort of plastic paper that feels like ordinary paper when touched. They do not have a sticky or adhesive surface. Instead, they require heat to seal one side of the laminate sheet to the other side of the laminate sheet. A laminating machine is used to produce heat.
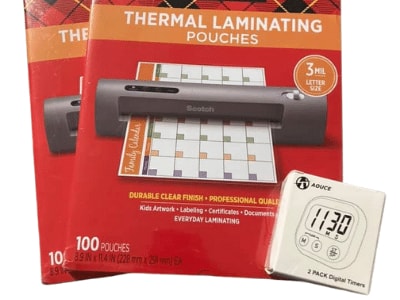
However, if you don’t have a laminating machine or access to one then you can use an iron to accomplish the task.
The steps below describe how to laminate a document using a laminating pouch:
- Open the pouch and align the document accurately in the middle of the pouch. Leave equal distance around the edges.
- Place the pouch with the document inside on a flat surface, an ironing board will be most appropriate.
- Place a thin towel over the pouch carefully to protect it.
- Set your iron to medium heat level. Iron over the towel for about 30seconds. Ensure you cover all the parts of the pouch beneath the towel.
- The heat melts the plastic edges together and encases your document.
- Repeat the process until all areas are covered.
This method gives your document a very professional look.
4. Laminating using Layering Method
This method uses carton sealing tapes to laminate bigger items such as children’s learning images. The concept is slightly the same as laminating using clear packing tape.
It offers a solution if the tape is too thin to run in one layer on the paper so you put it in layers. To use this method, follow the steps below:
- Roll out several pieces of tape and carefully overlap them to get the desired size you need. Ensure the edges of the tape slightly overlap each other.
- Centrally place the paper over the overlapped tapes and press it down.
- Repeat the process for the top tape.
- Use a ruler to smooth out the wrinkles and air bubbles.
- Cut the edges evenly using scissors to get your desired laminated paper.
This method comes with downsides such as several lines at intersection points and air bubbles but it offers stronger protection that ensures the durability of materials.
You now realize you don’t need a laminating machine in order to laminate at home. The methods discussed above are easy and straightforward. The tools needed are also affordable to most households compared to buying a laminating machine. The low prices of the laminating materials offer great benefits to you and the laminated document.
Conclusion
We can conclude that there are four main ways of how to laminate at home without a machine. All you need to have is a working space, an iron, a towel, a pair of cutting scissors, thermal laminating pouches, and clear packing tapes which are all affordable and can easily be found in your nearest stationery shop. The only way to find out how efficient these methods are is to try out one of the methods.
Keep visiting Workjoes for more information on Work From Home, Business, Workplace, Career, Office Decor, and Online Courses.